November 24th, 2009, 09:12 AM   1
Yohann Gissinger
Members

Join Date: Jul 2008
Location: France
Posts: 23
Kilim Restoration

Hello to all,

I have a 2 bands anatolian kilim, I'm gonna restore by myself. I'd like to show you and share, step by step, how I'm gonna do and what kind of problems encountered.

Maybe we won’t have enough time to show the entire restoration this way, but a part of it could be enough to evocate all the kilim restoration situations.

I’m not a professional restorer, just an amateur with few years of experience. I’m sure some of you know much more than me on this subject, but at the same time a lot of you have never pass the gap and probably won’t ever…

I hope it could be a collaborative work and you will help me along (don't forget that criticize is easier than doing), with debates and with your knowledge about restoration technique, dyes or anything useful for this project.

To complicate the exercise (and to show the limits), I would use for a part, some wool picked up from kilim fragments.

I’m gonna do that live, in real time, a bit every day after work, with a report every week if possible, so excuse me in advance for the lags.


I hope you will enjoy
Yohann.
November 24th, 2009, 02:56 PM   2
Yohann Gissinger
Members

Join Date: Jul 2008
Location: France
Posts: 23
Definition of the area

Here a picture of the area I choose for the experience (not the easiest):


Have I really said that?
November 24th, 2009, 03:23 PM   3
Dinie Gootjes
Members

Join Date: May 2008
Posts: 8

Hi Yohann,

What a great project and what a great idea to show your progress on Turkotek. Don't you love the feeling of satisfaction once you have transformed a raggedy piece into a rug that can hold its head high?

We have one band of a large Anatolian kilim which I showed on Turkotek some time ago. It has lots of darns and pull-the-stuff-together repairs. I guess they kept the thing together, but a thing of beauty they are not. I have some experience with repairing piled rugs, but I never dared touch the kilim. I fear it is a rather unforgiving medium. Maybe I will dare after you show us how. Success with your project.

Dinie
November 26th, 2009, 03:13 PM   4
Yohann Gissinger
Members

Join Date: Jul 2008
Location: France
Posts: 23

Hello Dinie,

Thanks for your encouragements.


from Yanni Petsopoulos "KILIMS" (1979)
November 27th, 2009, 04:38 PM   5
Yohann Gissinger
Members

Join Date: Jul 2008
Location: France
Posts: 23
Part-I

Hello to all,

Before anything the kilim has been washed (Of course)


The tools...


The warp of a precedent repair...


The wefts...


The precedent repair was fast done, with small diameter warp of coton, easier to pass and to remove in this case.


I also had to remove some of the original weft (the less possible)


To join a healthy foundation (at least not so bad).


The most damaged part of the area I keep as it is on the picture for now.


The cleaned area....
The beggining is the simplest and fastest to do.
It's always faster to destruct than to build...

Regards,
Y.

Last edited by Yohann Gissinger; December 13th, 2009 at 06:59 PM.
November 28th, 2009, 11:22 AM  6
Rich Larkin
Members

Join Date: Jun 2008
Location: Massachusetts
Posts: 11

Hi Yohann,

This is very interesting. I am watching to see what methods you use to insert new warps and to establish correct warp tension. Good luck.

Rich Larkin
November 28th, 2009, 11:38 AM   7
Yohann Gissinger
Members

Join Date: Jul 2008
Location: France
Posts: 23
Send a message via MSN to Yohann Gissinger
PartI-

Hello to all,

Before continuing I'd like to show you the negative image of the area as it is now.


For now I keep the kilim at differents steps of repairs and used parts "removing", to keep markers of the design for a later rewefting (for instance the breadth of the horizontal "stem"), to prevent losses during manipulation (following picture) or to think a little more about what to do before making an irreversible move...


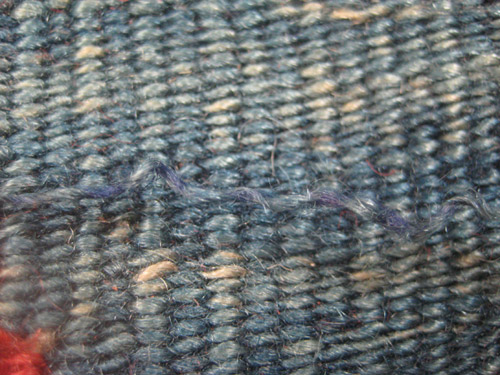
a close look at a used part with an old warps repair, to make you feel the texture and the fragility of a used place...

Next step rewarping...regards,
Y.
November 28th, 2009, 12:47 PM  8
Dinie Gootjes
Members

Join Date: May 2008
Posts: 8

Hi Yohann,

You mention that the area is cleaned. Does that mean that you washed the whole piece?

Dinie
November 29th, 2009, 04:18 AM   9
Yohann Gissinger
Members

Join Date: Jul 2008
Location: France
Posts: 23

Hello Dinie,

The whole piece has been washed by a professional, and I use the word "clean" understanding washed+old repairs removed...

Regards,
Y
November 29th, 2009, 11:34 AM   10
Rich Larkin
Members

Join Date: Jun 2008
Location: Massachusetts
Posts: 11

Hi Yohann,

In case you don't get too many responses on this thread, don't lose interest in posting. It is extremely interesting to me, and very well executed by you. Incidentally, don't hesitate to explain the simple for the more backward among us. For example, what was your point in posting the negative?

Another incidental observation: It is a very handsome piece.

What is your judgment of the color lying just under the rings of the scissors in your image? Has it suffered a great deal of fading?

Rich
November 29th, 2009, 11:37 AM   11
Yohann Gissinger
Members

Join Date: Jul 2008
Location: France
Posts: 23
Part-2 Rewarping

The tools...


How I insert new warps...


How I verify the tension...


...

Regards,
Y
November 29th, 2009, 12:10 PM   12
Yohann Gissinger
Members

Join Date: Jul 2008
Location: France
Posts: 23

Hello Rich,

Thanks a lot for your interest.
You've got the eye, there's something like a uniform fadding of this color...and the black ran during the washing.

It takes a lot of time to repair and to take/post the pictures and to do all the rest... I hope Dinie and you with some others, will help me adding remarks at anytime you think it's useful.

Regards,
Y.

P.S. the negative picture helps to see the used areas
November 30th, 2009, 11:37 AM  13
Dinie Gootjes
Members

Join Date: May 2008
Posts: 8

Hi Yohann,

As Rich says: keep on going and keep on posting.

Smart way to test the tension. I understand that you do not put the part you are working with on a frame, as Peter Stone suggests. Do you not find it necessary? And you, Rich?

Dinie
November 30th, 2009, 01:15 PM   14
Yohann Gissinger
Members

Join Date: Jul 2008
Location: France
Posts: 23

Hello Dinie,

Thank you to follow the experience.
I have never read Peter Stone, but I'm not sure that tightening the piece when there's a hole could be a great idea, especially on a weaked area.
It could create some distortions hard to manage.


Regards,
Y.
December 2nd, 2009, 08:58 PM   15
Rich Larkin
Members

Join Date: Jun 2008
Location: Massachusetts
Posts: 11

Hi Dinie, Yohann and all,

I wouldn't presume to advise on this impressive job, so well presented here. I have found that if the rug is not secured to a frame to establish a baseline of warp tension around and within the area to be repaired, it can be difficult to control the tension of the newly installed warps. The smaller the hole, the less the problem in this respect. I've never tried repairing a kilim in any significant way.

Fascinating pictures, Yohann.

Rich Larkin
December 3rd, 2009, 02:51 PM  16
Yohann Gissinger
Members

Join Date: Jul 2008
Location: France
Posts: 23

Hello Rich and the others,

The problem: If your warps are too loose you will have a bump after rewefting, if too much pulled you will have stressed repair.

I think there are few ways to insert warps, but in any case, the difficulty remains the same: anticipate the materials elasticity. In this experience, I began with a little hole to test the wool I use, before doing a bigger one.

I would be glad to read a different way to verify the tension ...
Best regards
Y.
December 6th, 2009, 10:33 AM   17
Yohann Gissinger
Members

Join Date: Jul 2008
Location: France
Posts: 23
Part2...

Hello to all,

Here some pictures of the kilim as it is for now compared to the initial condition.


and the places lasting for rewarping...

Thanks to follow the experience, next pictures soon...
Regards,
Y.
December 13th, 2009, 05:37 PM   18
Yohann Gissinger
Members

Join Date: Jul 2008
Location: France
Posts: 23
Part 2 Rewarping last shots

Hello to all,


The last place to rewarp:


The problems were still the same with old bad repairs tu pull out, a disformation to eliminate (as possible) and some losses in the white area:


The precedent rewarped area's


and the last one:

Now I have finished rewarping there.


Best regards,
Y.

Last edited by Yohann Gissinger; December 14th, 2009 at 06:39 PM.
December 14th, 2009, 04:36 PM   19
Yohann Gissinger
Members

Join Date: Jul 2008
Location: France
Posts: 23
interlude

Hello to all,

Before beginning the third part, it seems convenient to me to specify something.

According to my humble experience, I note that there are differences between the restoration/repair of a rug and that of a kilim. Those differences result from their own particular characteristics. If the kilim (slit tapestry) doesn’t allow many dissimulations because it is fine and reversible, it is quite to the contrary of a rug, which velvet allows one to dissimulate coarser repairs.

To answer the remarks of Dinie and Richard, there are certainly several techniques of rewarping the perforated parts. If you stretch the piece the goal is to obtain an area “without” deformation when the intervention is finished, i.e. when the kilim is not stretched.
On this subject, one can imagine very well to alternate the phases of stretching and relaxing the concerned area in order to control the tension of warps…

Coming next in the part3:


Which color is adapted for rewefting?


Is it possible to reweft with wool picked from fragments?

Regards,
Y

Last edited by Yohann Gissinger; December 16th, 2009 at 11:33 AM.
December 20th, 2009, 06:33 PM   20
Yohann Gissinger
Members

Join Date: Jul 2008
Location: France
Posts: 23
Part 3-Rewefting

Hello to all the readers,


The tools: Among the tools I will use, note the daylight lamps (2X26W, light temperature 5500K and IRC: 9,55/10) and the adjustable old loom in its new employment.

The goal of this Part 3, is to recreate the weft missing parts and dissimulate the operation to the eyes as well as possible. Even if it’s evident, it’s impossible to give back a piece it’s birth condition.

For this experience, I have commercial tapestry wool and old “Anatolian” fragments to realize the “rewefting” (fragments are not as antique as the patient and come from different areas).


In case of a real no matching between the colors, I can send pictures and samples of wool to a specialist in tapestry wool dying, and ask him for one or few bath(s) but I hope it won’t be necessary…

I use the commercial tapestry wool for the surounding parts only, even if it fade with time, it won't be too much visible. For now I make a mix of plies of different colors to obtain the right section and the right color. see by yourself (right following picture, 2 plies in the middle):


The insertion of new wefts between old wefts remaining


To obtain a good result the weaving technique must be copied


The precedent photo with the needle is the rewoven left down corner of the following picture, the new weft start in the original one:

etc...


One can remark, the original weaving chronology is not respected there...
Best regards,
Y.

Last edited by Yohann Gissinger; December 20th, 2009 at 09:56 PM.
January 1st, 2010, 11:36 AM   21
Rich Larkin
Members

Join Date: Jun 2008
Location: Massachusetts
Posts: 11

Hi Yohann,

May I say once again, these are two masterful jobs you are doing: first, the repair, and second, the presentation. Accordingly, as I've mentioned already, I would not presume to advise you how to do it. However, I will mention my suggestion, noted elsewhere in one or two of the threads, about adjusting color on commercial yarns.

I have had success with RIT, a dye product relatively widely available in the USA in supermarkets, department stores, larger pharmacies, hardware stores, etc. It is sold in both liquid and powder form, and can be used in any quantity on a stovetop. I have re-colored wool yarns sold for crewel or tapestry work with this product in order to tweak hues to match repair projects. It is even possible to achieve several slightly different shades of essentially the same color for rugs that feature significant abrash. In the same vein, separate strands of re-colored yarns can be re-plied together to give the yarn a livelier appearance and improved blending ability. Often a commercial yarn will require a slight neutralization of the color in order to be satisfactory for a project, and RIT works quite well in those instances.

An issue with these dyes is stability. I have not yet suffered untoward results with any re-colored sections of pile. However, since looking at Pierre's excellent salon on dyes, I have tested some of the yarn batches I dyed in the past with RIT. I sandwiched the re-dyed yarns between two white pieces of cotton clotn and ran hot water over them. Some of the reds left stains on the cotton, but not so with the yellow or blue. My sense is that the leakiness of the red could also be controlled with a bit of care and experimentation.

Incidentally, the manufacturer does not recommend the use of the product on wool, presumably on account of the need to place the fabric in hot or boiling water. Nevertheless, I have been largely happy with my results. I haven't found the hot water to affect the yarn adversely. If there is any perceptible effect, it is that it may make the yarn a bit fuller, which is usually a plus.

On other matters, it seems you have not encountered any difficulty establishing correct tension of either warp or weft. Also, did you mention where you got the warp yarns?

Happy New Year, and more "bravos" for your work.

Rich Larkin
January 1st, 2010, 06:40 PM  22
Yohann Gissinger
Members

Join Date: Jul 2008
Location: France
Posts: 23
Interlude

Hello Rich,

First I want to thank you for your kind and clever participation. I can feel through this thread you and Dinie have experienced the restoration and the points you insist on, are really the difficulties encountered. I feel less lonely

On other matters, it seems you have not encountered any difficulty establishing correct tension of either warp or weft. Also, did you mention where you got the warp yarns?

About the physical characteristics of the warp yarns:

The warp yarns come from Turkey. It's natural yarn especially used for kilim weaving it has the same spinning characteristics than the original even regarding to the irregularities.

Even if the characteristics of the materials are similar, it doesn't mean the result will be simple to obtain. Often in restoration what you technically get from a side is a loss from another, and problems become more difficult to resolve as work progresses because imperfections accumulating.

In this experience, the yarns I use when juxtaposed to the original ones in some places are detectable under the fingers due to the addition of two strong threads with the same diameter, thus I had to reduce the places of juxtaposition to dissimulate the repair.

Regarding to this problem of juxtaposition, I developed for this experience (in real time) a special technique that I didn’t reveal you yet. If the result is satisfying don’t forget to ask me revealing it. This is complicated but it would undoubtedly satisfy definitely your questioning on how to verify the tension with big holes.

About the matching weft color:

In France we don’t have RIT as far as I know, but maybe it can help if it’s not too aggressive for the wool.

Even with hundred colors available matching is a real difficulty especially for old pieces which underwent the patina of time. Without matching the repair is visible of course!

Moreover I don’t think RIT can solve the fading problem of commercial wool. Indeed I would fear it complicate too much the operation for a temporarily matching only.

The mixing technique I use with commercial different colors yarns is quite invisible and need less time than a treatment of the wool. In any case, I wouldn’t use nor mixing, nor RIT technique for huge areas of such a kilim because I suspect commercial wool fading in about 10 years.

Happy New Year and thanks a lot for your bravos
Coming back from holidays to the loom next monday,
All the best

Last edited by Yohann Gissinger; January 9th, 2010 at 04:09 PM.
January 2nd, 2010, 08:46 AM   23
Chuck Wagner
Members

Join Date: May 2008
Posts: 1

Hi Yohann,

There are others - I have been silent because I have neither the skills or the time (or much to add to already very well stated dialogue..) to try repairing any of the pieces that require work. If a true retirement ever presents itself, I intend to remedy the situation.

I would like to congratulate you on an excellent presentation of your work, and really good photography to illustrate your points. This was a fine job, and needs to be added to our archive as a valuable reference.

Best Regards,
Chuck Wagner
January 2nd, 2010, 08:57 AM   24
Filiberto Boncompagni
Administrator

Join Date: May 2008
Location: Cyprus
Posts: 7

Yohann,

I concord with everything Chuck just wrote, of course.
Thanks!

Filiberto
January 4th, 2010, 06:40 PM   25
Donald Ruyle
Members

Join Date: Jun 2008
Posts: 1

Yo! Yohann:

Sorry, I just could not resist the salutation. This is a wonderful posting you are doing, not to mention the difficulties of the repair project. Thank you very much for the undertaking. I will be following with intense curiosity and wish you the best in the project, as I am sure many are without responding.

Best regards,
Don Ruyle
January 5th, 2010, 09:24 AM  26
Julia Watson
Members

Join Date: Dec 2009
Posts: 5
Rug Repairs

Hello All

Thank you for posting your project, Yohann. I have enjoyed learning more about how this kind of repair work is done.

I am an avid rug novice and an experienced dyer specializing in natural dyes (vegetal, insect). I have used modern synthetic dyes as well. RIT would not be my first choice to dye yarns for repair work as the composition and lightfast properties of these dyes are variable. A modern fiber-reactive dye might be a better choice. You can order a set of several colors in small quantities along with the necessary auxiliaries from an online dye supplier. They are intermixable and quite easy to use.

Or, for a bit more work and a lot more fun, how about trying the new powdered natural dyes? Pre-mordanting is not difficult. If your original rug has natural dyes, then the repair work might age more harmoniously.

Julia Watson
January 5th, 2010, 05:04 PM  27
Richard Larkin
Members

Join Date: May 2008
Location: Massachusetts
Posts: 9

Hi Julia,

I am sure a nice salon on the use of some of these dyes would be very well received by the T'Tekkers. It wouldn't have to be too elaborate, just examples and results. I sort of blundered onto RIT years ago and found it to solve some color adjustment problems. I'd love to learn about available resources that are manageable for the skill-challenged enthusiast (unlike Yohann) and maybe more effective than RIT.

Rich Larkin

Last edited by Richard Larkin; January 6th, 2010 at 02:01 PM.
January 6th, 2010, 11:53 AM  28
Dinie Gootjes
Members

Join Date: May 2008
Posts: 8

Hi Julia,

I second Rich's motion. Something like that would be just great.

Dinie Gootjes
January 6th, 2010, 02:21 PM   29
Julia Watson
Members

Join Date: Dec 2009
Posts: 5
Dyes for wool

Hello Dinie and Richard, I am happy to share the information. How do we propose a new salon topic? I'm not sure if I am allowed to post suppliers' names on this site. Would that be considered 'commercial promotion'? I have no connection with these companies other than being a customer.

Julia
January 6th, 2010, 03:01 PM   30
Steve Price
Administrator

Join Date: May 2008
Posts: 62

Hi Julia

If you'd be willing to prepare the introductory essay, just generate it as a Word document indicating the positions of whatever images you'd like in it, and send it to me (sprice@vcu.edu) as an e-mail attachment. Also, send me the images as JPG files as e-mail attachments. I'll set it all up and send you the URL so you can correct all my mistakes before showing it to the public.

Mentioning and recommending the sources of things used in dyeing is no problem. We just don't promote commerce in rugs and textiles and we prefer not to promote one source as preferable to another for the same item. That is, if Sherwin-Williams paint does the job best, feel free to say so. But if it can be purchased at Sears, Home Depot, Lowes or Walmart, we'd rather not point the reader to one of them unless there's a pressing reason to do so.

Regards

Steve Price
January 6th, 2010, 03:11 PM  31
Pierre Galafassi
Members

Join Date: Oct 2009
Posts: 3

Hi Johann,
Outstanding thread, highly enjoyable!
Pierre
January 7th, 2010, 10:01 AM   32
Julia Watson
Members

Join Date: Dec 2009
Posts: 5
Wool dyes

Thank you, Steve. I'll give it a try. Dinie ad Richard, say tuned.

Julia
January 7th, 2010, 04:03 PM   #33
Yohann Gissinger
Members

Join Date: Jul 2008
Location: France
Posts: 23
Part III-(suite).

Hello to all,
Yo bro!

Nice to see people on this marathonian thread.Ty.

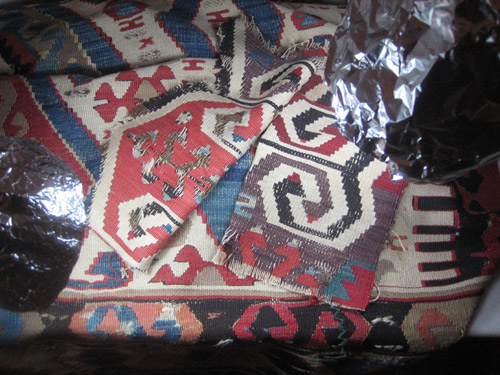
Here some pictures of the picking operation:


The heap in the center belongs to the patient, on the sides the fragments with their own wool.


A before/after passing a bit of water on the accordions:


Actually, the wool picked from used pieces is often cutted by wear or very thin...

Next step soon,
Cordiales salutations,
Y

Last edited by Yohann Gissinger; January 7th, 2010 at 04:10 PM.
January 7th, 2010, 04:59 PM   34
Julia Watson
Members

Join Date: Dec 2009
Posts: 5
Wool dyes

Dinie and Richard,

After re-reading the Salon 129 essay by Pierre Galafassi, I see he has covered the topic of dyes quite thoroughly. Perhaps we could move our dye discussion there as the subject seems off-topic for this thread. Modern acid dyes (in small quantities) are available to artists and craftspeople from many online sources. They are easy to use with some basic equipment and a good eye for color mixing.


Julia
January 7th, 2010, 05:29 PM   35
Steve Price
Administrator

Join Date: May 2008
Posts: 62

Hi Julia

Pierre has done a great job presenting the history of dyeing wool and debunking many of the marketplace myths about dyes. On the other hand, he doesn't deal with how the collector/hobbyist might use dyes in his own projects. It would be reasonable to extend the scope by moving a thread on dye usage at home into his discussion forum except for one thing: that forum will close tomorrow as a new Salon is introduced.

If you're still interested in doing it, a Salon with a focus on using dyes on do-it-yourself projects would be most welcome. I agree that following it up in this thread would ultimately detract from Yohann's superb presentation.

Regards

Steve Price
January 7th, 2010, 05:32 PM   36
Richard Larkin
Members

Join Date: May 2008
Location: Massachusetts
Posts: 9

Hi Julia,

My thought was that you could show samples of dyeing jobs you have undertaken with the various dyes and dyes types with which you are familiar.

Rich Larkin
January 8th, 2010, 03:35 PM  37
Julia Watson
Members

Join Date: Dec 2009
Posts: 5
Wool dyes

Steve,

I will prepare a short essay to introduce the topic over the weekend. I hadn't noticed how long Salon 129 has been running! I am very new to TurkoTek. Gosh, it's hard to resist those emoticons but I don't feel I've been here long enough. In Vermont, you don't speak up at Town Meeting until you've been around for twenty years.

Julia
January 10th, 2010, 10:49 AM   38
Yohann Gissinger
Members

Join Date: Jul 2008
Location: France
Posts: 23
Part-III

Hello to all,

Thanks to all of you for supporting this thread,
I' hope not to disappoint your waitings by revealing what follows…

Before:


After


One have to anticipate the visual effect when selecting wool for rewefting, especially if the colors do not match exactly (like in this case see#19 pic2).
The approximative color matching and the bad condition of the wool picked from the fragments complicates much the task.

Don't hesitate if any question or comment...
Next step soon,

Bien à vous,
Y
January 10th, 2010, 08:53 PM   39
Rich Larkin
Members

Join Date: Jun 2008
Location: Massachusetts
Posts: 11

Hi Yohann,

MARVELOUS!!!!!!

Rich Larkin
January 11th, 2010, 11:33 AM  40
Dinie Gootjes
Members

Join Date: May 2008
Posts: 8

Hi Yohann,

Terrific.

I am really looking forward to seeing your next steps.

Dinie
January 24th, 2010, 05:17 PM   41
Yohann Gissinger
Members

Join Date: Jul 2008
Location: France
Posts: 23

Hello to all,

The is continuing


The before and after:

One can remark a different mixing technique of plies, here the plies of different colors succeed one to each other and are not mixed together.
It allows to recreate the original irregularities and to approach the original blue tone with different fragmentary sources.


It's not exactly like the original, but it looks like it could have been...


and it lays flat.


There's a problem in the next step, I hope you will stay tuned during this week.

Best regards,
Y

Last edited by Yohann Gissinger; January 26th, 2010 at 05:50 PM.
January 27th, 2010, 03:06 PM   42
Laurel Chamberlain
Members

Join Date: Jan 2010
Posts: 1
Where have you been all my life?

I just found this forum while checking out a damaged kilim for sale in the UK. I have several not especially valuable ones, but they all need work and I have been afraid I'd make them worse. Am about to move to central Virginia from a tiny house in California and hope to set up a work area. Your photos and discussion will be invaluable. My 1st question to M. Gissinger is: How do you prevent further damage when you wash the rug? Do you baste the worst parts to keep them from disintegrating further? I use Orvus paste soap (also great for washing raw fleeces) and sometimes add diluted lanolin as a conditioner. We have lovely spring water up here in the mountains of Southern California, and with the low humidity rugs dry fairly quickly. Am starting with pieces that don't need a new warp/weft, but it is still very difficult to find the right wool, as you know. Thank you again for this forum...Laurie
January 28th, 2010, 06:14 PM  43
Yohann Gissinger
Members

Join Date: Jul 2008
Location: France
Posts: 23

Hello Laurie,

Each case is different. Here is for example, a kilim head end temporarily secured for the water washing operation:


This may help you to prevent losses if you adapt it...
Y
January 31st, 2010, 06:05 PM 44
Yohann Gissinger
Members

Join Date: Jul 2008
Location: France
Posts: 23

Hello to all,


Here a picture of the problematic area I can't reweft for now (the down part of the pic):
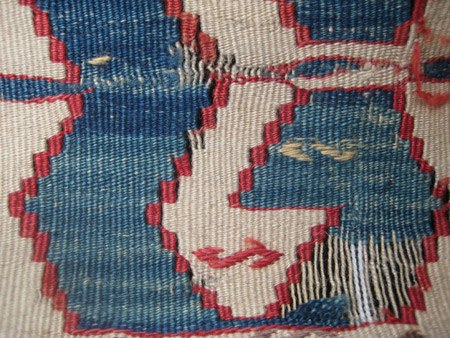


At the origin, the discussion should have begun with a part n°0, entitled “research of wool”, because it is the first difficulty and it is determining for the success of the operation.

In this experience, I bought the fragments on Internet, based on the following pictures and few more not better lightened:


Among the difficulties, one has been to evaluate the quality of materials under poor conditions. Thus I must be satisfied with 2 fragments of kilim with approximative but solid dark blue color, even if I have to marry them.
I should buy samples with better correspondances but it would have been much expensive. The competition with collectors increases the fragments prices regarding to the quantity of material pickable.
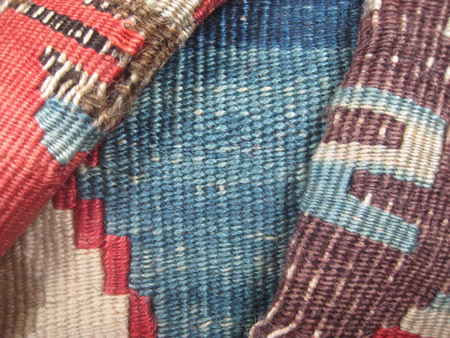


Once the samples in hand, any problem is not isolated, because the simple external comparison of the weft, is not enough revealing (even if it is tempting to conclude in advance).
Indeed, to be sure of the uniform fastness (or the absence of chemical hard wash), it is also necessary to look at the correspondence between the parts of fibres exposed to the external agressions, and those which were protected in the thickness of the kilim. I took care to carry out this checking for the dark blue, I omitted to do so for the light blue… ouch!


This sample comes from the 1st fragment (1st pic), it's the ONLY color that has this problem on this piece. Quite to the contrary, in the second fragment, only the blue and purple are strong.
When I place fibres in their new housing (even when keeping the accordions intact), a purple halation irradiates the place whereas it should tend towards the blue-green!
Anyway the color isn't solid...


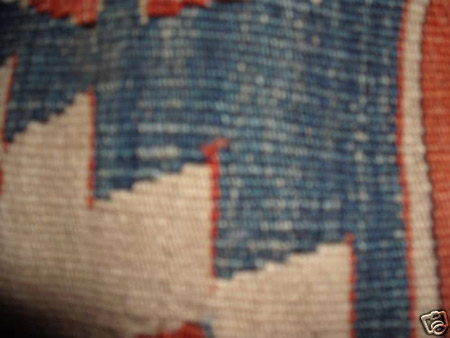
As you can see, it’s about a week I’m blocked to the precedent step. While this time, I looked at some internet auctions to find samples ( Laurie). I found the following piece and asked the seller a close up:
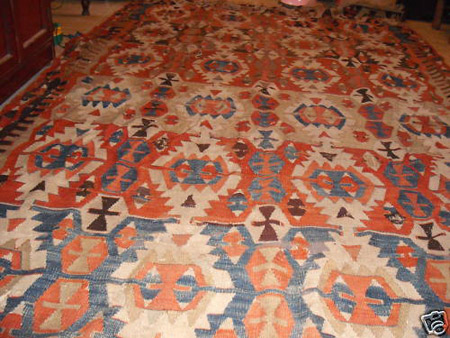


I‘ ve been especially retained by the lack of clarity and lighting of the pictures and lose the auction....

What would you do instead of me??

Any fragment selling offer would be studied in this "restore a kilim project"!
(please, ask Steve or Filiberto to contact me directly out of the thread).

Best regards,
Y

Last edited by Yohann Gissinger; January 31st, 2010 at 06:53 PM.
February 2nd, 2010, 05:29 PM   #45
Yohann Gissinger
Members

Join Date: Jul 2008
Location: France
Posts: 23

Hello to all,

I initially began this experience according to the following reasoning:

- If the colors of wool from old fragments has resisted during several decades, then their dyes are durable.
- If these dyes are durable, then, the aspect I would give to the restoration would be durable too.
- If the restoration is nice, then the part will validly be restored for a long time.

I had considered too, that the colors of the restored areas could vary (obviously) in a different way from the areas around, in this case, they would possibly preserve a rustic aspect which could be well integrated in the whole piece.

Actually my fair blue samples don't match with the area, nor are strong dyed.

At this stage of the experience, there is in my opinion, only two solutions to take up the challenge and to respect the coherence of the restoration on the whole piece:

-1/To continue the restoration of the dark blue areas and leave the problematic zone on side waiting for an appropriate fragment.

-2/To ask a Master dyer some special baths and start again work.

What's your point of view?

Regards,
Y

Last edited by Yohann Gissinger; February 2nd, 2010 at 05:49 PM.
May 3rd, 2010, 04:05 PM  46
Unregistered
Guest

Posts: n/a
Good work need handpsun wool for kilim resto...

It is all good work, with all these images and information for a kilim restoration. For an old kilim restoration always you need hand-spun wool to make perfect repair ... Old wool might be not always good... any way thanks for this information on the net..

greetings from Konya

Muammer Ucar
June 20th, 2010, 12:53 PM   47
Yohann Gissinger
Members

Join Date: Jul 2008
Location: France
Posts: 23
The final kilim restoration round

The classical before/after:


Some close up:


Remember:


Y
June 20th, 2010, 01:31 PM   48
Steve Price
Administrator

Join Date: May 2008
Posts: 62

Hi Yohann

Thanks for sharing this. After this thread has gone about 10 days with no new posts, I'll add it to our archive. It will be interesting to a lot of people for a long time.


Regards

Steve Price
June 23rd, 2010, 01:54 PM  49
Yohann Gissinger
Members

Join Date: Jul 2008
Location: France
Posts: 23

Hello Steve,

Thanks for your kindness and for your confidence, it helped me along.


In the silence of turkotekers, I hope the level result is not deceiving and I hope this experience will serve anyway.

Y